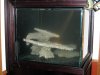
Banner image

Fritz's Home Display - Tank Build (1 Viewer)

Wood is Walnut
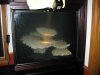
All moldings are custom milled
We had to tint the wood then stain it with a custom black cherry stain to match the furniture already in the room.
I had my finisher at work do it all in his paint booth.
 
Formally: Bond, James hahah
...........
Next time you need a fish out of a tank, call chad. Hes like a fish whisperer.
 
Thanks.

It is smoking awesome!

Couple of updates:

Water is in and I am playing with fire. When the whole system is off I have about 4 gallons spare, and the skimmer isn't in yet. I am debating going custom with Bob.

The frag tank is full of aptasia. I was hoping to move everything up in one shot... Now I am thinking, not. So, I guess I will be running the frag system till the end of the summer and curing all new rocks for the sump. Li figured because I am planning on a copperband, it will be fine... but I am not going to take my chances with something I don't want to change for a minimum of 5 years. Well, as long as there are critters in by poker season :beerchug:

We just measured the rock and we got lucky it barely fits in the canopy, lol. Casey is pushing me to get the display rocks in ASAP. The lights will be removable, but I might as well get the rock in first. So, I am draining and filling tonight :)
 
5 months and this tank is not even wet! :gay1:

Don't even think I will let you off the hook for first-to-full-glass-to-glass-SPS-Race. I still have my stuff growing in the basement!

Though... I did bust up some pieces trying to kill aptasia...grrr:gay1:
 
I saw this the other day in person...and wow, it's amazing. The stand actually looks like it comes out of the wall as one piece. It's so beautiful. Good work guys!!!
 
Had problems getting the pictures off my phone,,, a crud.... I just messed up all the pictures on photobucket.

bah... trudging forward :)
 
6.jpg

Concept shot

92DisplayPainta.jpg

tools

93Gal-2009-12-15-3web.jpg

tank

93Rockwork2010-01-6.jpg

rockwork

Plumbing3.jpg

plumbing

much too small sump

92DisplayPaintc.jpg

paint

92DisplayPaintd.jpg


buildstand00.jpg

the space

Buildstand0.jpg


BuildStand2.jpg

the bottom is empty under this portion because there is an air vent. Chad ended up popping a grill in on the left. Its is very unobtrusive.

BuildStand1.jpg


HomeDisplay-002.jpg


BuildStand5.jpg


BuildStand6.jpg


BuildStaind-Fill-water.jpg


BuildStand7.jpg

light tray

lightrackbottom.jpg
Hanging T5s
It turns out we can only fit 2. I'm pretty stuck on using the Radium for the MH so I might try 2 fiji pink for the T-5s... bah you know I will try all of them. Curses!

Lightracktop.jpg

other side

Skimmer3.jpg

Smaller one is mine.
 
Last edited by a moderator:
Scott and Casey helped me get the rock in today... have to wait for those pictures, they are on yet another camera. :coolmad:
 
What are you moving up from the basement? If it's just sps you could always cut them from the base to avoid introducing the aiptasia. I know you wanted to introduce big colonies but it might be better to start small now and avoid a problem that will surface down the road.
 
Ya that's the plan at this point. I usually do that anyhow since the fear of AEF got in me. I trust no one, not even myself :) I figure every move is a chance to avoid those beasts.

Its the sump rock that sucks. I have lots of great sponges and critters ... and if I moved up that rock I could move EVERYTHING at once, Fish corals and sponges. Plus I am going to have 3 systems running all summer if I don't do the quick move.... Still, I would rather play prude and get it going well for the winter.

One good thing is the basement is super stable and I plan on going on vacation for a month or two around MACNA time. I can move the corals and fish up after that... so there is an upside... You understand wanting to get it flying though....

Mantra: patience, patience.... patience :biggrin:
 
Let There Be Rock!

attachment.php


attachment.php


attachment.php
 

Attachments

  • 92display-RockIn.jpg
    92display-RockIn.jpg
    103.3 KB · Views: 465
  • 92display-RockIn-(2).jpg
    92display-RockIn-(2).jpg
    76 KB · Views: 28
  • 92display-RockIn-(1).jpg
    92display-RockIn-(1).jpg
    85.5 KB · Views: 466
  • 92display-RockIn-(3).jpg
    92display-RockIn-(3).jpg
    34.1 KB · Views: 462
Last edited by a moderator:
Rock on Rock baby.
Black acrylic I cut out for the bottom of the tank. It turnes out the cut out makes a perfect cover for the overflow. I don't want any algae growing in there since I do not have access. The acrylic is cut just shy of the silicone. I did paint the bottom so there would be no bleeding. The Rock work was a team effort from Scott, Casey and I. When we designed it we did it on an uneven surface... That came to bite us as the large piece ended up resting on two sharp points. We added a couple of clear acrylic chunks to stabilize it. I plan on acid bathing rock soon for the LR refugiums for this tank and the wall of fun. I bet we can get some chunks off that. Of course I will be begging for help. Scott could barely get under there and he is 6'2"

This would have been the perfect rock in a 70 cube LPS tank. It is definably going to be a bit goofy in a SPS tank, but I can't bring myself to not use it!
 
Last edited:

Users who are viewing this thread

Back
Top